Winter Plastering and Rendering in Australia: What You Need to Know

What You Need to Know
Winter plastering and rendering in Australia is possible, but it requires extra care. Cold temperatures slow curing, increase moisture retention, and raise the risk of cracking. By controlling temperature, adjusting materials, and timing the work correctly, you can achieve durable, long-lasting finishes even during winter.
Winter arrives, and suddenly your plastering or rendering project feels risky. Cold nights, damp mornings, and slower drying times can quickly turn a simple job into a costly repair. If plaster cures too slowly, it can crack. If render traps moisture, it may blister or fail months later. Many homeowners rush winter jobs—only to redo them in summer.
The good news? Winter plastering and rendering in Australia can be done successfully when you understand the conditions, adapt your approach, and know when to call in professionals. I’ll walk you through exactly how to do it right.
Winter Plastering and Rendering
- Can You Plaster and Render in Winter?
- Why Winter Conditions Affect Plaster and Render
- Ideal Temperature and Weather Conditions
- Winter Plastering and Rendering Checklist
- Best Materials and Mix Adjustments for Winter
- Common Winter Problems (and How to Prevent Them)
- DIY vs Hiring a Professional in Winter
- Conclusion
Can You Plaster and Render in Winter?
Yes — but only if conditions are managed correctly.
In most parts of Australia, winter temperatures range from mild days to very cold nights. While daytime conditions may seem fine, overnight drops can disrupt curing, especially for external rendering.
Key takeaway:
Winter work isn’t about speed — it’s about control.
Why Winter Conditions Affect Plaster and Render
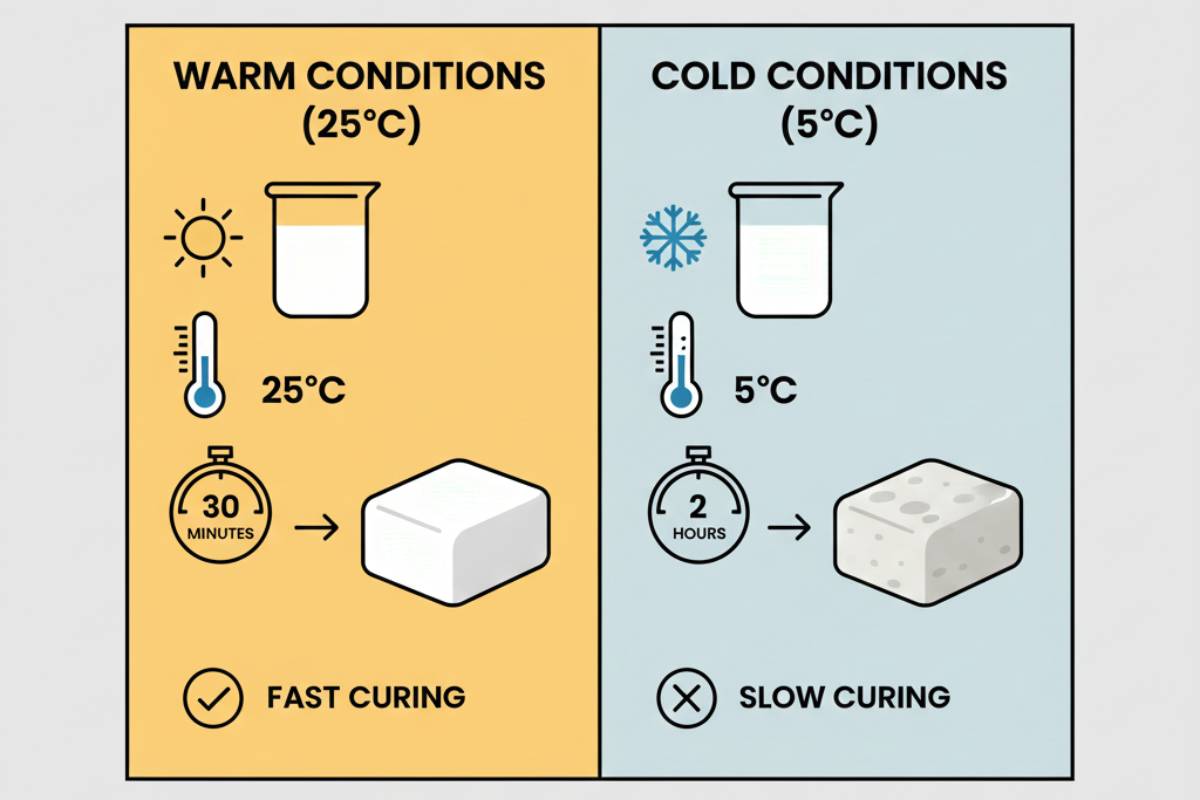
Plaster and render harden through a chemical curing process. Cold weather interferes with this in three major ways:
- Slower curing: Low temperatures delay chemical reactions.
- Higher moisture retention: Damp air prevents evaporation.
- Thermal movement: Day–night temperature swings cause expansion and contraction.
Without proper planning, these factors can lead to:
- Hairline cracks
- Weak surface bonding
- Powdery or chalky finishes
Ideal Temperature and Weather Conditions
While exact requirements vary by product, these are widely accepted guidelines:
- Optimal temperature: 15°C–25°C
- Minimum safe temperature: 5°C (above freezing)
- Avoid: Frost, heavy rain, and high overnight humidity
Pro tip:
If overnight temperatures fall below 5°C, fresh plaster or render must be protected with insulation, covers, or controlled heating.
Winter Plastering and Rendering Checklist
Use this quick checklist before starting any winter job:
- Check 48-hour weather forecasts (especially night temperatures).
- Start work late morning, not early dawn.
- Use cold-weather-approved materials or accelerators.
- Protect surfaces overnight with insulated covers.
- Allow extra curing time before painting or sealing.
Best Materials and Mix Adjustments for Winter
Material choice matters more in winter than in any other season.
Plastering Tips
- Use fast-setting plaster where appropriate.
- Avoid over-watering mixes (this increases drying time).
- Maintain indoor airflow — but avoid cold drafts.
Rendering Tips
- Consider acrylic or polymer-modified renders, which perform better in cold conditions.
- Use approved accelerators sparingly.
- Never apply render to frozen or excessively cold substrates.
What to avoid:
Adding extra cement “to make it dry faster” — this often causes cracking later.
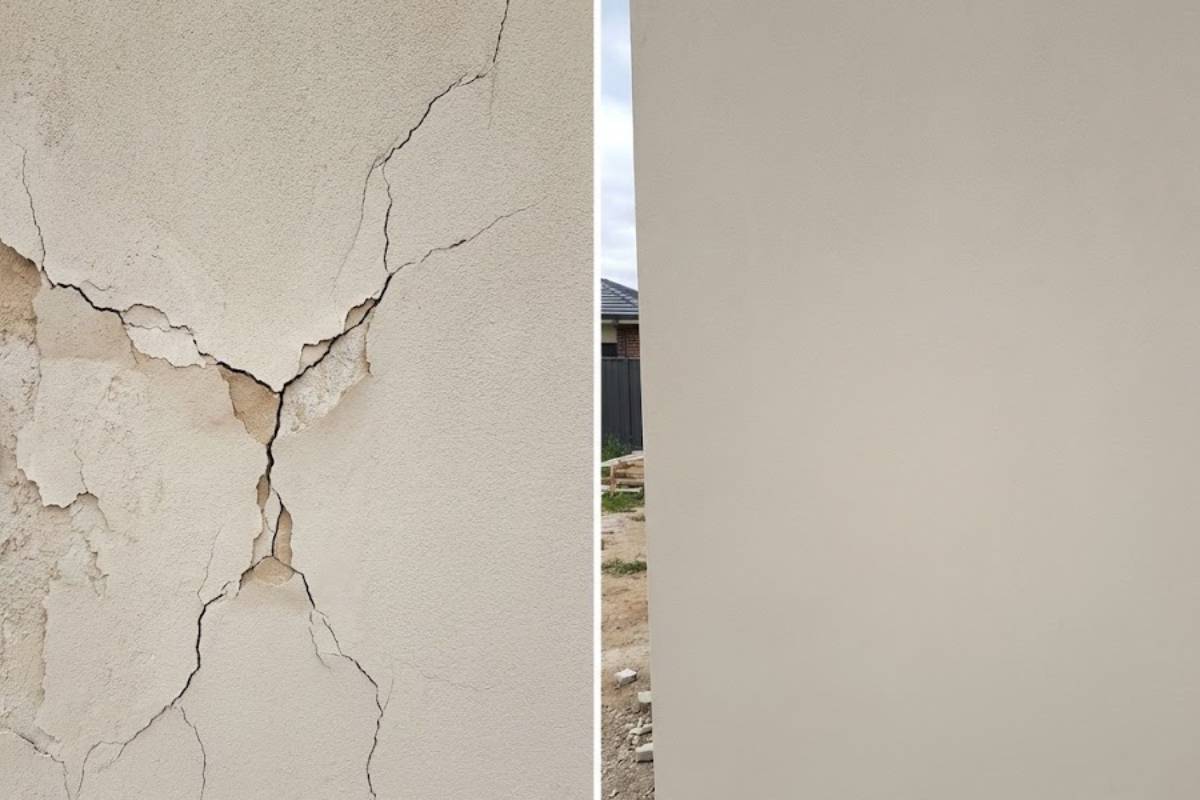
Common Winter Problems and How to Prevent Them
1. Cracking
Cause: Slow curing + temperature fluctuation
Prevention: Controlled drying, correct mix ratios, and overnight protection
2. Efflorescence (White Powder)
Cause: Trapped moisture pushing salts to the surface
Prevention: Allow extended curing time before sealing or painting
3. Delamination
Cause: Poor adhesion due to cold substrates
Prevention: Warm surfaces slightly and ensure they are dry before application
DIY vs Hiring a Professional in Winter
This is where many homeowners hesitate — and rightly so.
DIY May Be Suitable If:
- The job is internal plastering
- You can control temperature and airflow
- You’re experienced and not time-pressured
Hire a Professional If:
- The work is external rendering
- Temperatures drop below 5°C overnight
- Structural integrity or warranties matter
Professionals bring:
- Climate-specific materials
- Temperature control systems
- Compliance with Australian Standards
If you’re weighing up costs for plastering work this winter, it’s also worth considering how pricing varies by plaster type and service — check out how much plastering costs in Australia for a detailed breakdown of typical rates and factors that influence pricing.
Bottom line:
Winter mistakes are expensive. Hiring the right contractor can save thousands.
Cost and Time Expectations in Winter
Winter projects may:
- Take 20–40% longer due to curing times
- Cost slightly more due to protection materials and labour planning
However, many homeowners benefit from:
- Better contractor availability
- Flexible scheduling
- Reduced peak-season pricing
Many homeowners choose to work with experienced local specialists such as Pro Plaster N Paint, who understand how Australian winter conditions affect plaster curing, render adhesion, and long-term durability. A winter-experienced contractor can adjust materials, timing, and protection methods to ensure the finish lasts well beyond the colder months.
Conclusion
Winter plastering and rendering in Australia isn’t a bad idea — it’s just a more technical one.
When you respect temperature limits, use the right materials, and protect the work properly, winter can deliver excellent results. The key is knowing when to adapt and when to ask for expert help.
Are you planning a winter plastering or rendering project right now?
Share your experience — your insight might help another homeowner avoid costly mistakes.